with Fundekals decals
US Air Force, USA 1948
Tamiya’s 1/48 P-47 series is famous (well, in modelling circles anyway) for being a superlative kit; it has been heaped with praise in various modelling magazines, websites and forums. Over the years I have built a few Tamiya kits, such as their MiG-15, F-51D, F-84G, Skyray, and A-1H and A-1J Skyraiders. They are all very nice kits, but I never found they quite reached the level of perfection that many claimed they had. Since so many were raving about the Thunderbolt I really wanted to build one, but how to find some markings so it would fit into my collection of post-WWII aircraft?
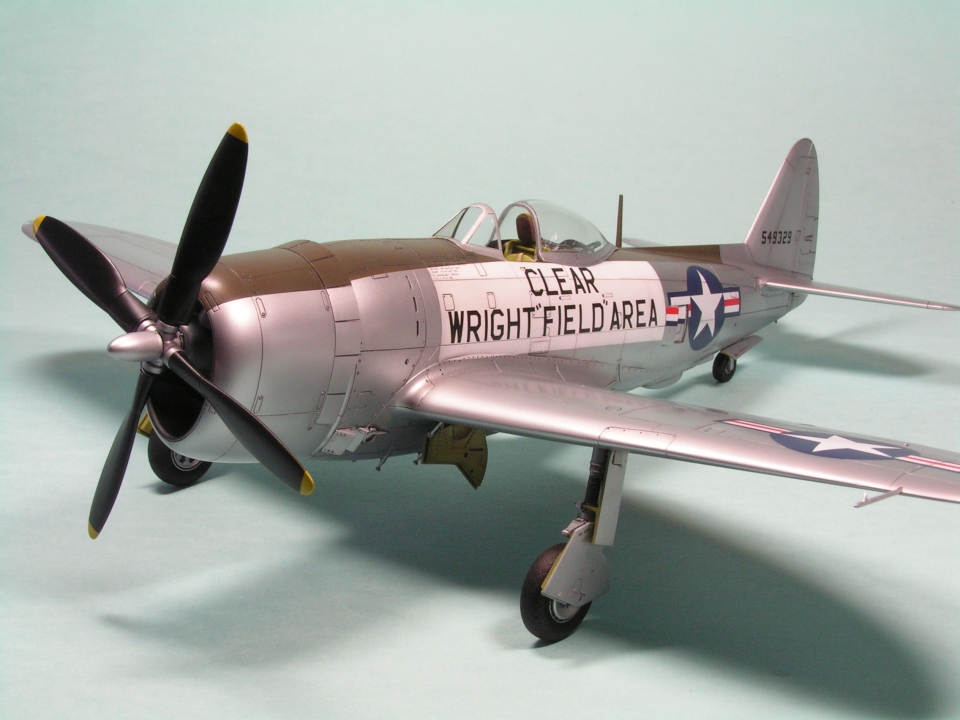
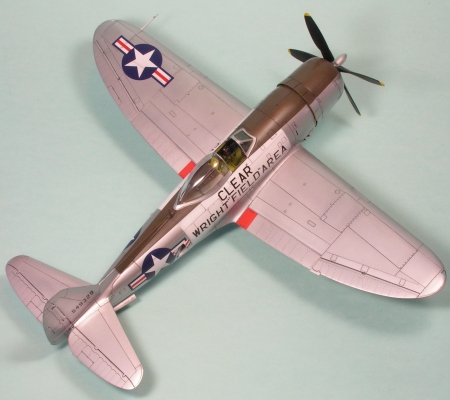
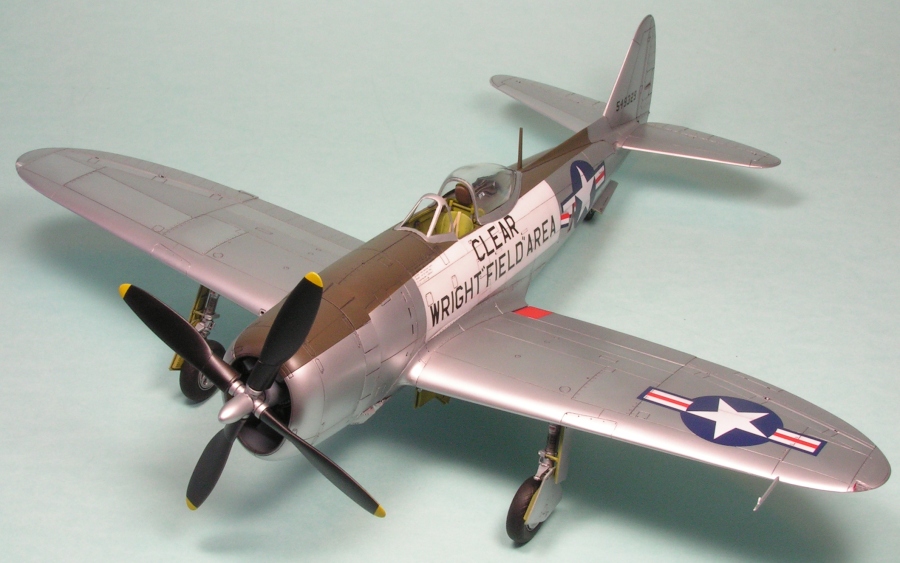
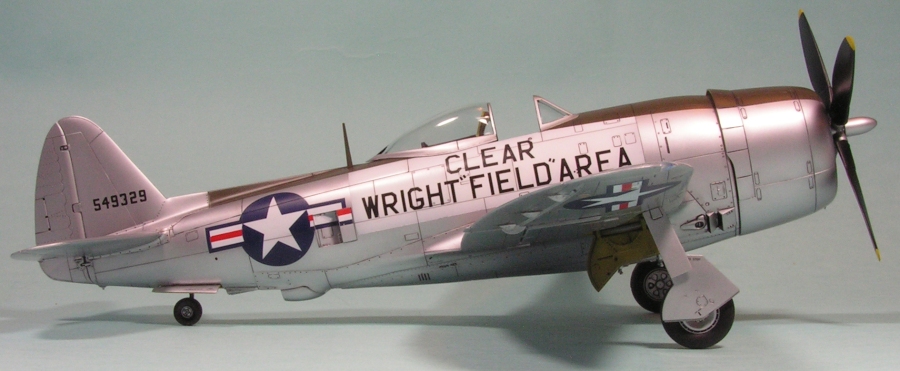
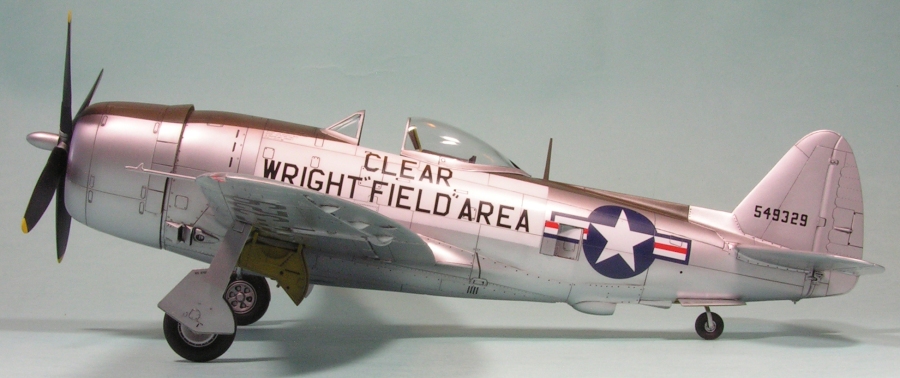
A request for ideas on the Hyperscale forums elicited a most helpful response regarding a post-war F-47D based at Wright Airfield. A profile photo was supplied showing a Thunderbolt in a simple natural metal scheme with stars ‘n’ bars and Olive Drab anti-glare panels. The most striking feature was a huge white panel along the fuselage bearing the inscription ‘CLEAR WRIGHT “FIELD” AREA’. Apparently this aircraft was used to prevent civillian light aircraft, which lacked radios, from entering Wright Field. One-off decals were sourced for the project, consisting of the fuselage lettering, tail number, aircraft information placard and a buzz number for the wing. With these in hand, the project commenced, alongside an Academy F-47N.
My source for the original picture also provided further helpful information (along with several other Hyperscale forum members) for modifying the Tamiya kit into a late model D (in this case, a D-40-RA, but as someone who rarely dabbles in WWII nomenclature, this didn’t mean a lot to me!). I had been informed that I needed the P-47M boxing by Tamiya, and I duly acquired this from Hong Kong for about half of the UK price from Lucky Model (gotta love Hong Kong!). The following modifications and clarifications were necessary to make sure I used the correct items; Tamiya supply a huge number of optional parts in this kit:
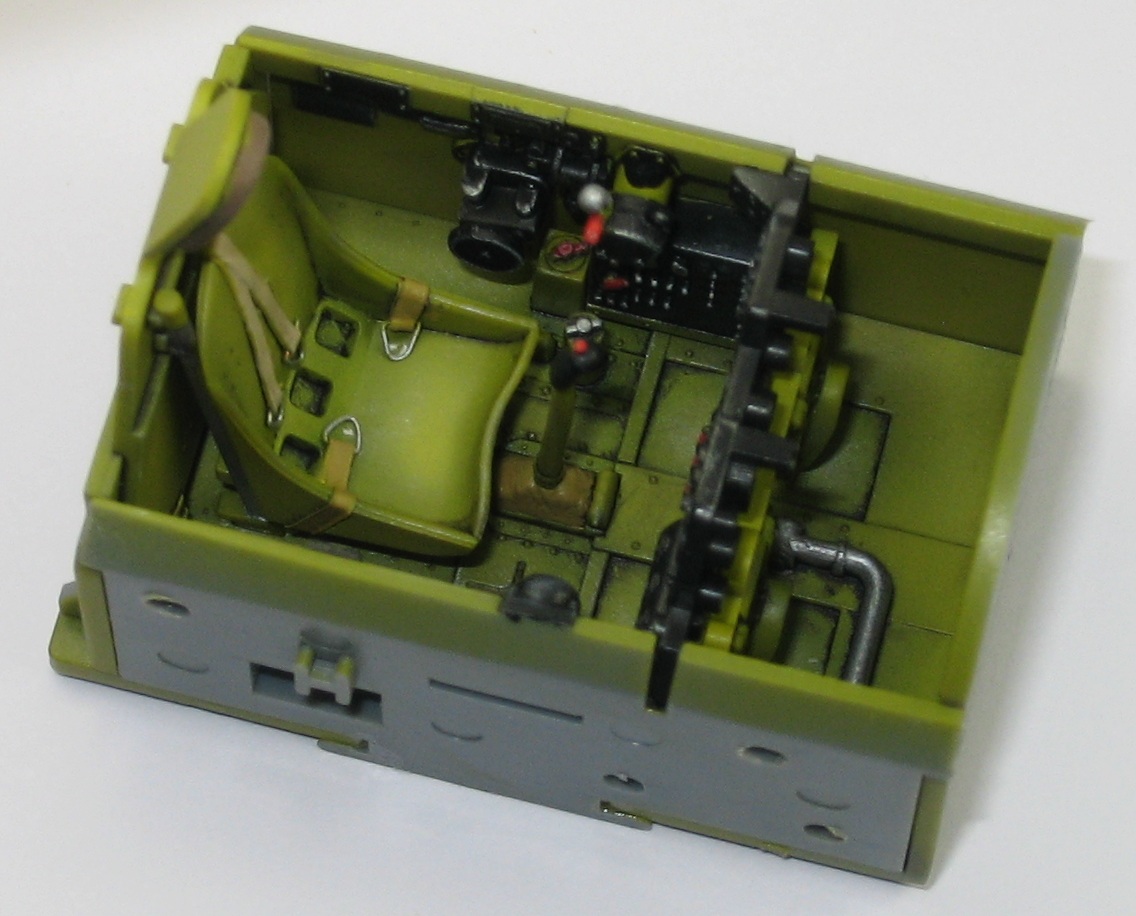
- I used the cockpit components for the M, with the non-corrogated floor. I had no idea which headrest was likely to have been installed, so went with the non-rectangular version (50/50 chance of being correct!). I omitted the gunsight (see below for why). I painted the cockpit Gunze Mr Color Interior Green, although I am aware this could well be wrong…
- Fuselage spine L12 (as in the M model) was used, since that matched the profile picture I had.
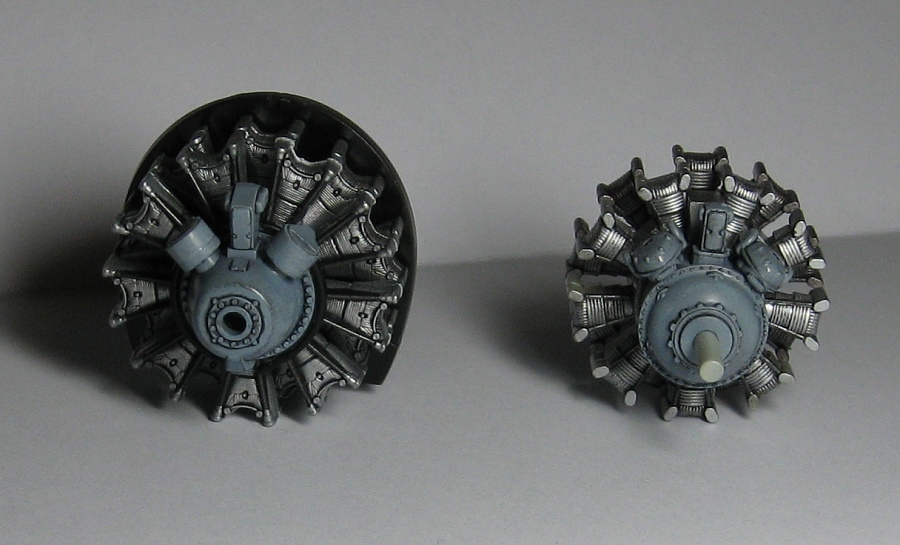
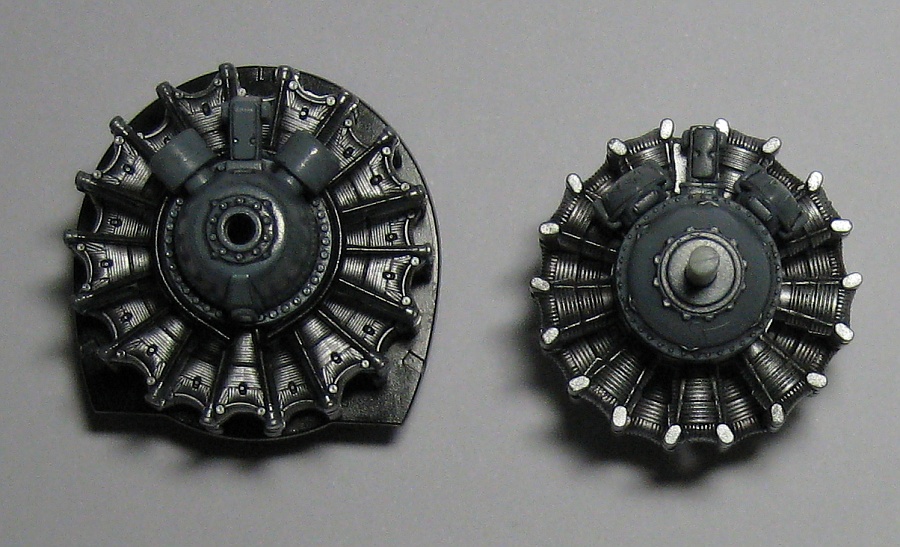
- Tamiya provide two engine crankcases, one suitable for the D and one for the M. I used the D version and the M parts were used for my Academy F-47N.
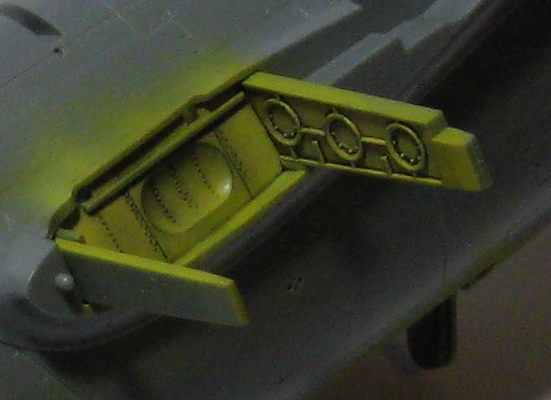
- There are several options for various panels under the wings. I used those suggested for the M variant (L15/16/17). No holes for pylons were drilled out, since it was clear from the photo I had that the pylons were not fitted.
- It was also clear from the photo that this F-47 had no guns. I added the gun inserts and filled in the holes with putty and superglue. For this reason the gunsight was omitted (and used in my F-47N).
- I fitted the wing flaps up, the cowling flaps open and the air outlets open to match the photo I had. The canopy would be opened for the same reason.
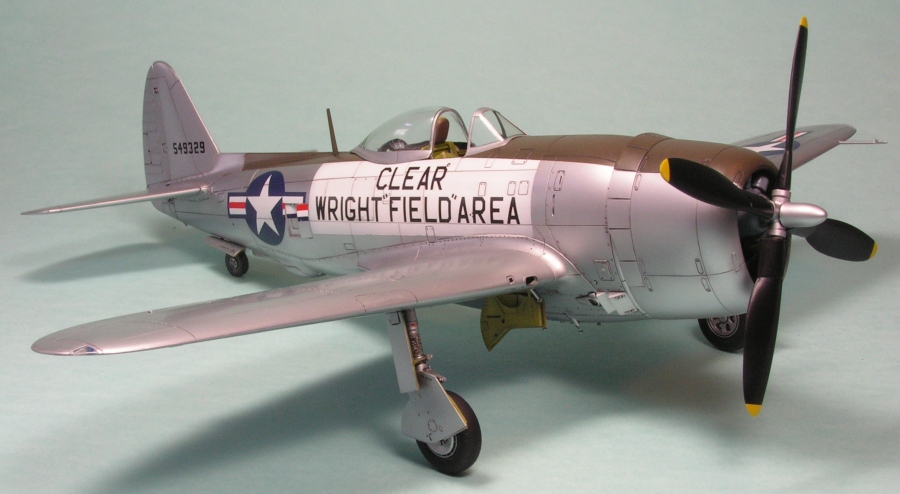
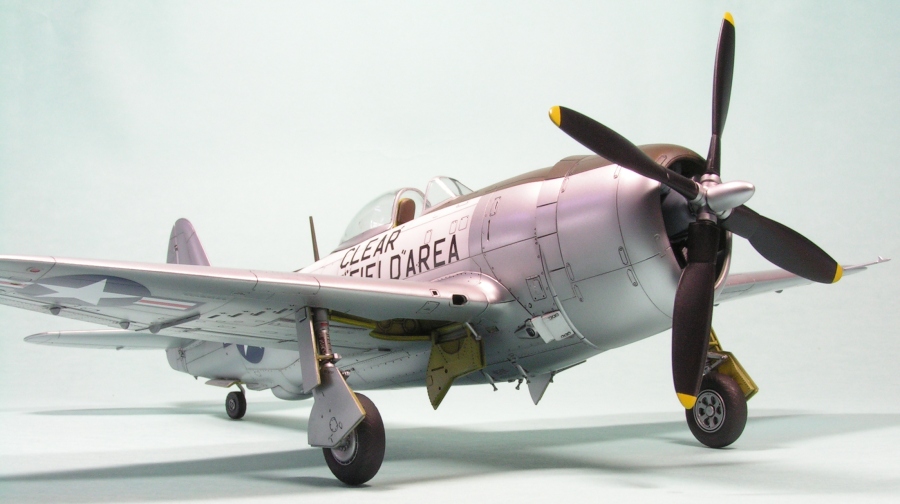
- Tamiya provide four different props. The one which matched the photo closest was the cuffed asymmetric prop (which is very similar to that provided in the Academy P-47N kit). I couldn’t get any of the other props provided to match the photo, so went with this one (G5/G6). I painted the prop spinner silver, although it may have been a different colour.
- No ordnance was necessary, so it was all consigned to the spares box.
Construction was a breeze and I marvelled at the quality of the engineering. All the parts fitted beautifully and with precision; no vague locating points in this kit! Everything just plugged in to where it belonged. Large parts of this kit could be built without glue. There is one area where Tamiya (along with many other Eastern manufacturers) needs to improve, and that is ejector pin marks. These plagued various parts and are a nightmare to remove (especially those on the inside surfaces of undercarriage doors). I continue to be surprised that Tamiya, Hasegawa, etc., allow these to ruin the fine detail they go to all the effort to include. In this kit, some of the circles were left alone, since they would be covered by things like the wheels, but in other places they remain visible.


Whilst the fit was amazing (and I loved the one-piece cowl) I did use superglue as a filler around the fuselage join. I have yet to build a kit that doesn’t require this somewhere. In fact, I used superglue to construct all of the kit as I continue to have bad experiences with liquid cement causing the plastic to shrink months after application. Superglue removes this effect completely and allows me to totally eliminate seams much more easily and quickly. The undercarriage components were all painted with Mr Color Zinc Chromate Yellow and then the upper wings were attached to the fuselage first, followed by the lower wings. The tailplanes fitted well enough that they could be left until after painting, as could the engine cowling.
Construction was slowed by having to polish out the seams ready for the natural metal finish. I used various grades of sandpaper and Tamiya polishing compounds applied using an electric toothbrush. Once I was satisfied I cleaned the model and wiped it down with Mr Color thinner ready for paint.
The first coat was Mr Surfacer 1200, used to provide a more robust surface for the subsequent Mr Color paints to adhere to and to check for any imperfections. The simple scheme was then started with the Olive Drab anti-glare panels. I actually had some trouble getting this area the right shape and it took me a couple of attempts until I was happy enough. It still looks odd from some angles, but matches the photo I have as best as I can determine. The OD was masked and I took a deep breath before applying the natural metal.
I only have access to Mr Color paints, and their metallic range is limited. It basically meant I would have to use Silver (8) as the base colour. This was sprayed over the entire airframe. I think this colour represents a silver painted airframe well, but I was trying to replicate natural metal! To get some variation in colour across the airframe I masked off some panels using hand-held paper card masks, and sprayed some areas in Mr Color Aluminium (218). This is a very fragile, buffable paint with a very fine pigment. It provided enough subtle variation for me (from many angles it is invisible). I then airbrushed some highly thinned Mr Aqueous Hobby Color Smoke along various panel lines. To get a finish that I find more aesthetically pleasing, I held paper card up to one side of the panel line, so that the shading only affected one of the two panels at the join. I was actually quite pleased with the overall effect — there was some variation to show it wasn’t just silver paint, and yet not too bright and shiny.
Then came the white box. In the picture I was working from the wing obstructs most of the lower edge of the box. Masking the bottom side was a compromise; the rectangle is not quite deep enough, but any deeper and it would interfere too much with the wing root. As long as the box was big enough to fit all the lettering I was happy. I used Mr Base White 1000, which, I still maintain, is the best white paint on the market! Johnson’s Klear was used as a protective barrier for the grey oil wash (thinned with lighter fluid) and as a base for the decals.
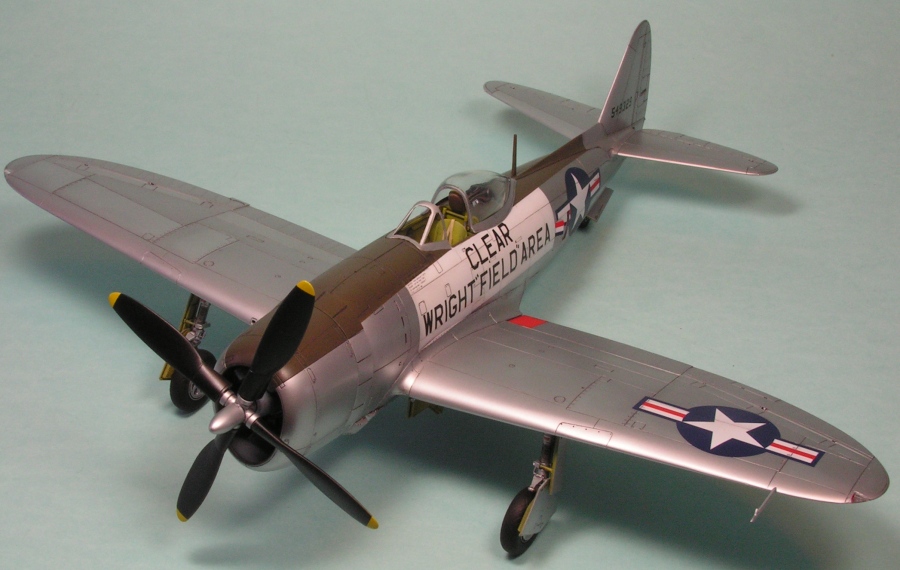
I used the kit stencils. I doubt most of them were on the real aircraft, but I love stencils (!) so applied them anyway. The stars and bars were more problematic. All my spare decals were back in the UK, so I couldn’t just search for replacements amongst my spares. In the end, the lower wing and fuselage insignia came from the Tamiya kit and had red stripes added from some Korean War insignia I had in another kit (the kind that just had the white stars, bars and red stripes). The red striping was not continued underneath the open air outlets, per the photo. The upper wing was from a Hasegawa kit, also with red stripes cut out and added. I wasn’t all that happy with my attempts at cutting and adding the red stripes; decalling continues to be one of my modelling blind spots! The Tamiya decals responded very well to Mr Setter; less so to Mr Softer.
The one-off decals were by Microscale and came off the backing paper super-fast. They were extremely thin and bedded down well. I used Microscale Microsol on them with no problems. Some of the decal placement was conjecture, especially for the upper wing insignia and the buzz code on the lower wing (if, in fact, it was present at all).
Some smaller parts, such as the spine aerial mast, were added before the airframe was finished with a mix of Pollyscale Satin and Flat varnishes. The undercarriage was added (I could have made a better job of this; take more care than I did to align the wheels properly relative to the legs) and then the canopy to finish the model.
Tamiya’s P-47 is a beautiful kit, and I am very happy to have had the chance to build one. As with any model, there are many things that could have been improved (especially the insignia markings), but I do enjoy looking at the finished article.
Many thanks to Jennings Heilig for his enthusiastic assistance and support in this project. Thanks also to various people on the HS forums who replied to my several questions regarding the P-47. All mistakes and errors are my own.


Year bought: 2007 (Lucky Model, Hong Kong)
Year built: 2008 (Caiyuan, Zhengzhou, China)
Back to home.

hi, just wanted to let you know that according to “aircraft in profile, volume one”, the panel was in fact “dayglow” , not white. i live in Dayton, Ohio and asked about this at the u.s. air force museum. i was shown a picture in color of the same plane with a bright orange side panel. i realize you must have been working from a black and white photo. i thought you might like to know. you can contact the museum and see if they will provide you with a scan of the plane photo. kind regards, roy cross
LikeLike
Hi Roy,
Thanks for your message and the information. Certainly very interesting and a dayglow panel would be a striking contrast. I was working from a very clear black and white photo, and the panel appears very white, but I guess you never know!
LikeLike